Top tips on editing like a Pro
Here’s how to edit video with adobe Premiere Pro, one of the best software tools for professional video editors and video production companies. This article highlights the top 5 Adobe Premiere pro tips and tricks to create a professional video.
If you are new to video editing or have just started working in this field, you might find it challenging to take your skills to the next level. In fact, there are so many things to know about video editing that you could probably spend years learning about it- let alone perfecting it. Fortunately, we’ve compiled a list of the top 5 Adobe Premiere pro tips and tricks that will help you get off on the right foot and achieve peak performance when using this software.
Create a Storyboard
If you want your viewers to enjoy your content, you need to make sure that it makes sense. A good way to ensure this is by creating a storyboard. A storyboard is a visual representation of your video’s storyline. It lets you plan out your scenes and add in details that can’t be seen in the edit itself. This way, you can ensure that your video flows properly and makes sense. A storyboard also lets you think through your visual shots before you start editing. This can be very helpful, especially if you’re working with a tight deadline and have limited time to work on your video. Storyboards aren’t just helpful for video production; they’re also great for improving your creative process outside of Premiere Pro. By sketching out how you want your video to look and feel, you can better identify any gaps in your storyline and come up with ways to fill those gaps. You can also use your storyboard to help you brainstorm ideas for shots and get a better idea of what kind of equipment you’ll need.
Know your editing tools
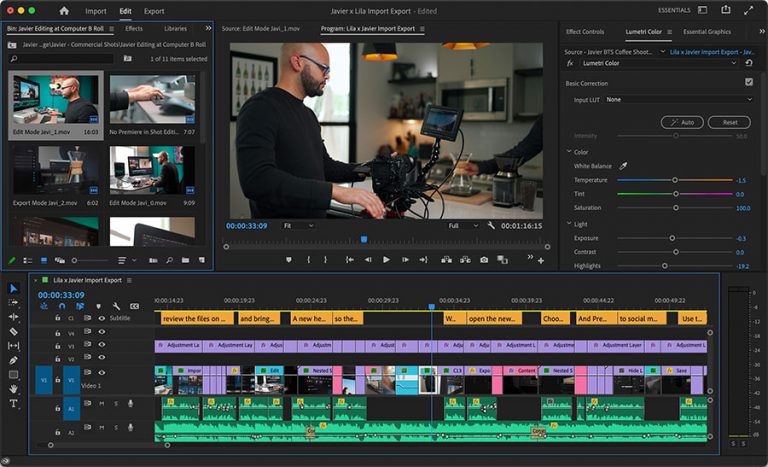
There are many tools available within Adobe Premiere Pro, and it’s important to know each of them inside and out so that you can use them effectively in your video. For example, you’ll want to familiarize yourself with the Timeline, Track, and Source Monitor. These three essential tools can help you create a professional video, regardless of the type of video you’re creating. Timeline – The Timeline is a visual representation of the different clips you’ve added to your video. It shows you where each clip begins and ends and lets you add transitions, titles, and other effects. Track – The Track is where you add and insert media into your video. It’s basically a timeline within your timeline where you can add different types of media. Source Monitor – The Source Monitor is like your video’s control panel. It lets you toggle between seeing your Timeline and your video itself. This can come in handy when you want to adjust your camera’s settings or add effects to your video. It’s also helpful for when you’re using external sources like Drone footage.
Add the Right kind of Music
Music is an essential part of any video, whether it be in advertisements, tutorials, or even vlogs. It’s what makes viewers sit up and take notice and can make or break a video. That being said, you’ll want to make sure you choose the right kind of music for your video. Most people don’t realize that there are different types of music that can be used in videos. Music can be broken down into different categories, such as ambient, cinematic, or upbeat music. Each category serves a different purpose, so you’ll want to make sure you choose the right one for your video. For example, cinematic music is great for trailers and advertisements. It’s dramatic and draws the viewer in, which is why it’s widely used in Hollywood. If you can, try to find out what type of music your audience members typically listen to. This way, you can tailor your video’s music to suit their tastes. It can also help to use a music discovery app like Spotify to find new music to use in your video. You can even use an online generator like AudioJungle to find music that’s specifically made for videos. Whichever category you choose, you’ll want to make sure the music flows well with your video. You don’t want an abrupt transition between your video and the music you’ve chosen. The best way to avoid this is to find out how long your video is and then find the music that’s closest to that length.
Use keyframing
Keyframing is one of the best ways to boost your production value and take your videos to the next level. It lets you change the speed and flow of your video, even after you’ve completed the edit. You can also use keyframing to create interesting visual effects and transitions. The best part is that Premiere Pro’s keyframing tool is incredibly easy to use. If you want to slow down or speed up a specific shot in your video, all you have to do is select the clip, click on the Animation button, and then click the Create new effect button. Next, simply choose the speed you want the clip to play at, and you’re set! You can also use keyframing to create interesting transitions between clips. For example, if you have two clips that both show a person walking, you can add a cool visual effect to make both clips look more interesting. You can also use keyframing to create more complex visual effects. If you have a clip that shows a large group of people walking, you can use keyframing to make it look like they’re all moving at the same time.
Organize with markers and labels
Every video you create will have a ton of information in it, and it’s important to keep it all organized. You can do this by using markers and labels in Premiere Pro. Markers are a great way to flag clips that you want to come back to or that you need to edit. If you’re working with a large team, you can use markers to identify who’s responsible for editing each clip. You can also use markers to flag scenes you’d like to add in or scenes you want to take out of your video. Labels, on the other hand, can be used to identify different parts of your video. For example, you can label each act and scene in a narrative video or identify different types of shots in a documentary video. You can also create custom labels if you need to. These tools can come in handy when you need to review your work with other people or if you want to do a final check before you upload the video online. You can also use these tools to come back to the video later on, especially if you’re working with a large team and need to pick up where someone else left off. By using these tools, you can quickly find the clips you need and keep everything in order.
editing video with Adobe Premiere Pro Summary
Now that you know about more about editing video with Adobe Premiere Pro, you can now start on creating that professional video production. Using these tips will help you create a video that flows well and keeps your viewers engaged from start to finish.
Try Adobe Premiere Pro here